
- Launch N-Stalker, wait till the GUI appears then click ‘ Update ‘ to update application
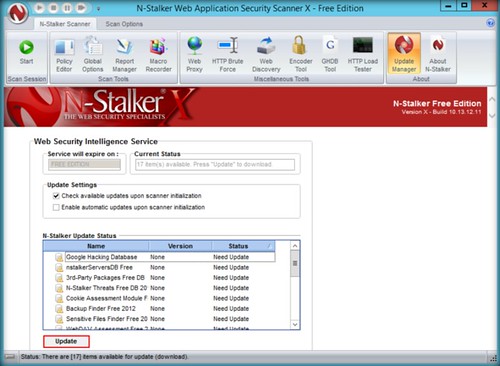
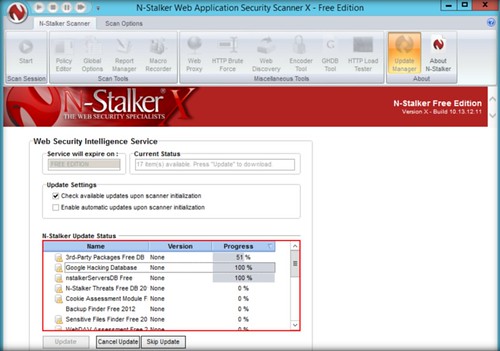
2. N-Stalker will soon update the database, wait some few minutes
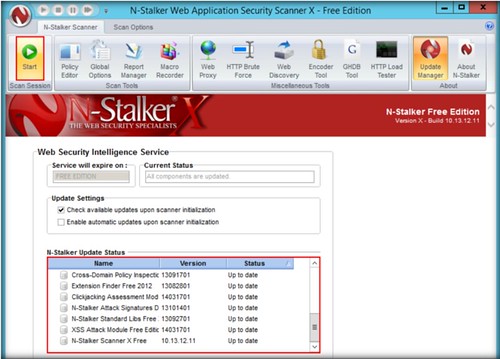
3. After the database update complete, click Start to rescan a new session
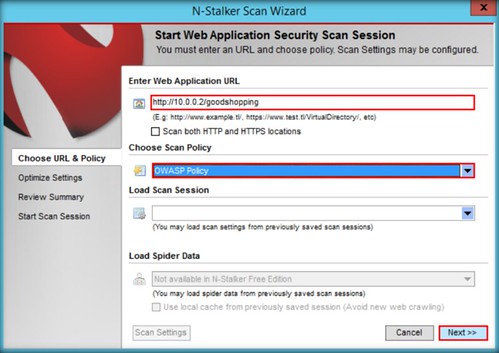
4. In the N-Stalker wizard, enter a URL of the web apps that will be scanned. For this example we use http://10.0.0.2/goodshopping. Choose OWASP Policy in Scan Policy tab then click next
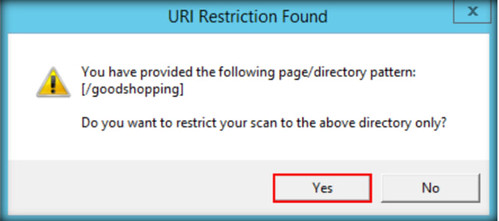
5. URL Restriction box will pop-up, click yes to continue
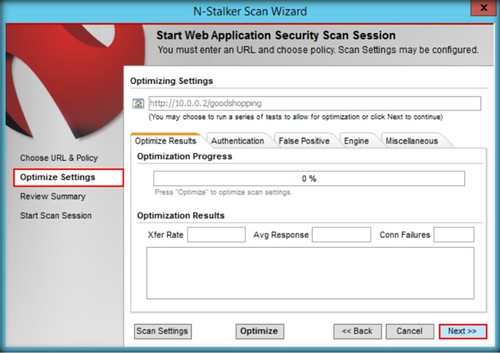
6. Click Optimize Settings, leave it default and click yes
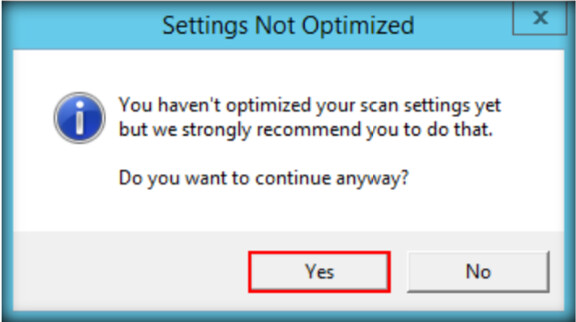
7. Click yes on the Settings not Optimized box
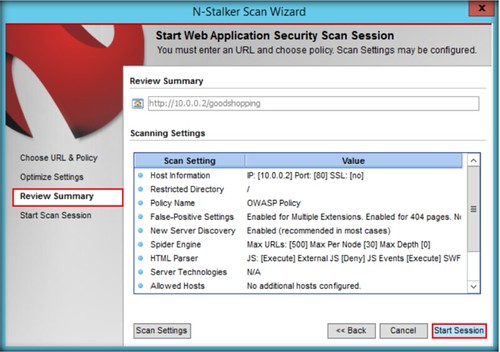
8. Click Review Summary, then click Start Session
9. Start Scan after complete finishing the configuration of N-Stalker to start scanning the website
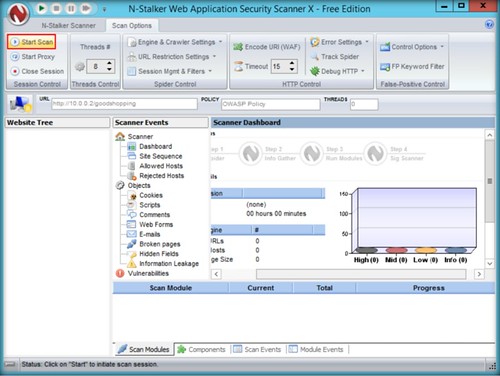
10. It will soon scan the website, as the chart is moving

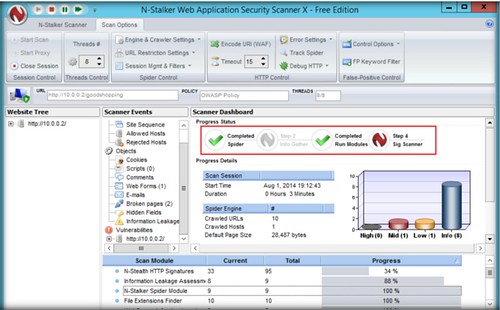
11. Let the apps scan the website. It has 4 steps which are Spider, Info Gather, Run modules, Sig Scanner
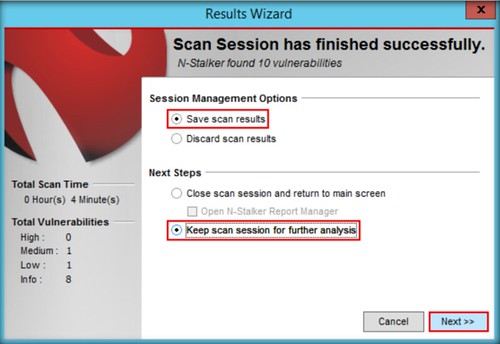
12. After finish the scanning, wizard box will appear. Click save scan result and keep scan session for further analysis, and then ‘ Next ‘
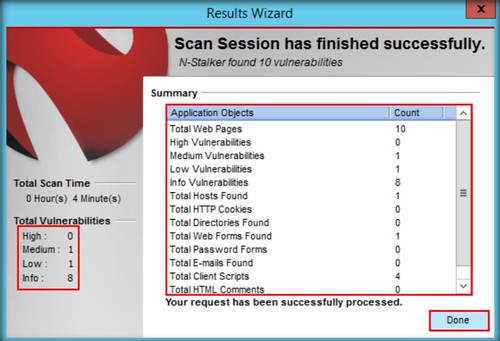
13. Summary of vulnerabilities will be shown, click done after finish examine that
14. On the left side, expand all nodes to see websites pages

15. Complete scan results can be seen the dashboard, it can also expand all the vulnerabilities of site’s vulnerabilities
